Setup Virtual Robot in Android Studio on Windows
Installing dependencies
Installing Android Studio
- Download the Android Studio installer.
-
Open the installer. Leave all of the settings as their defaults.
- Open the newly installed Android Studio app.
-
In the setup helper, select the “Standard” installation type. Leave all of the default settings.
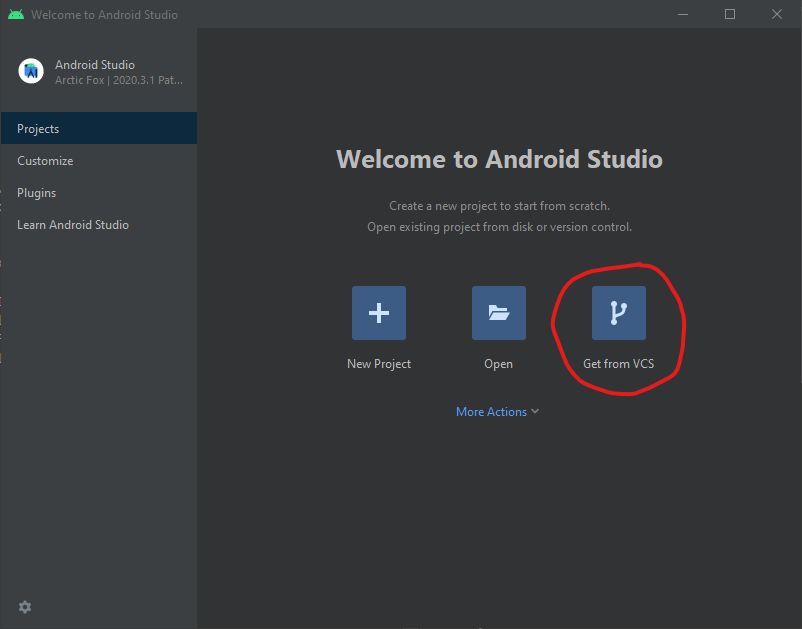
Loading the Virtual Robot project
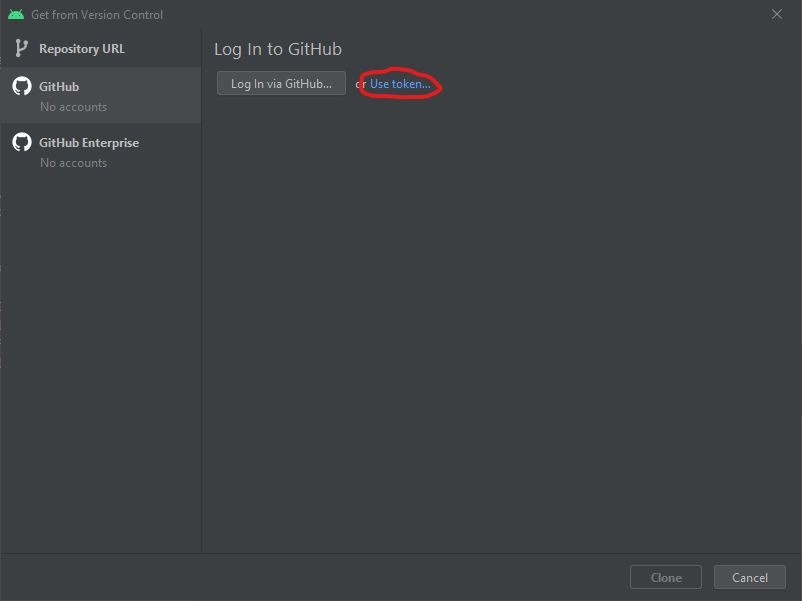
- In Android Studio, select “Get from VCS”.
- Select the GitHub tab.
- Add a GitHub token
- Select “Use token…”
- Select “Generate…”
- It will open the GitHub token creation page.
- Leave everything the same except the Expiration, set this to “No expiration”. You may need to change the Note section if you have another token with the same name.
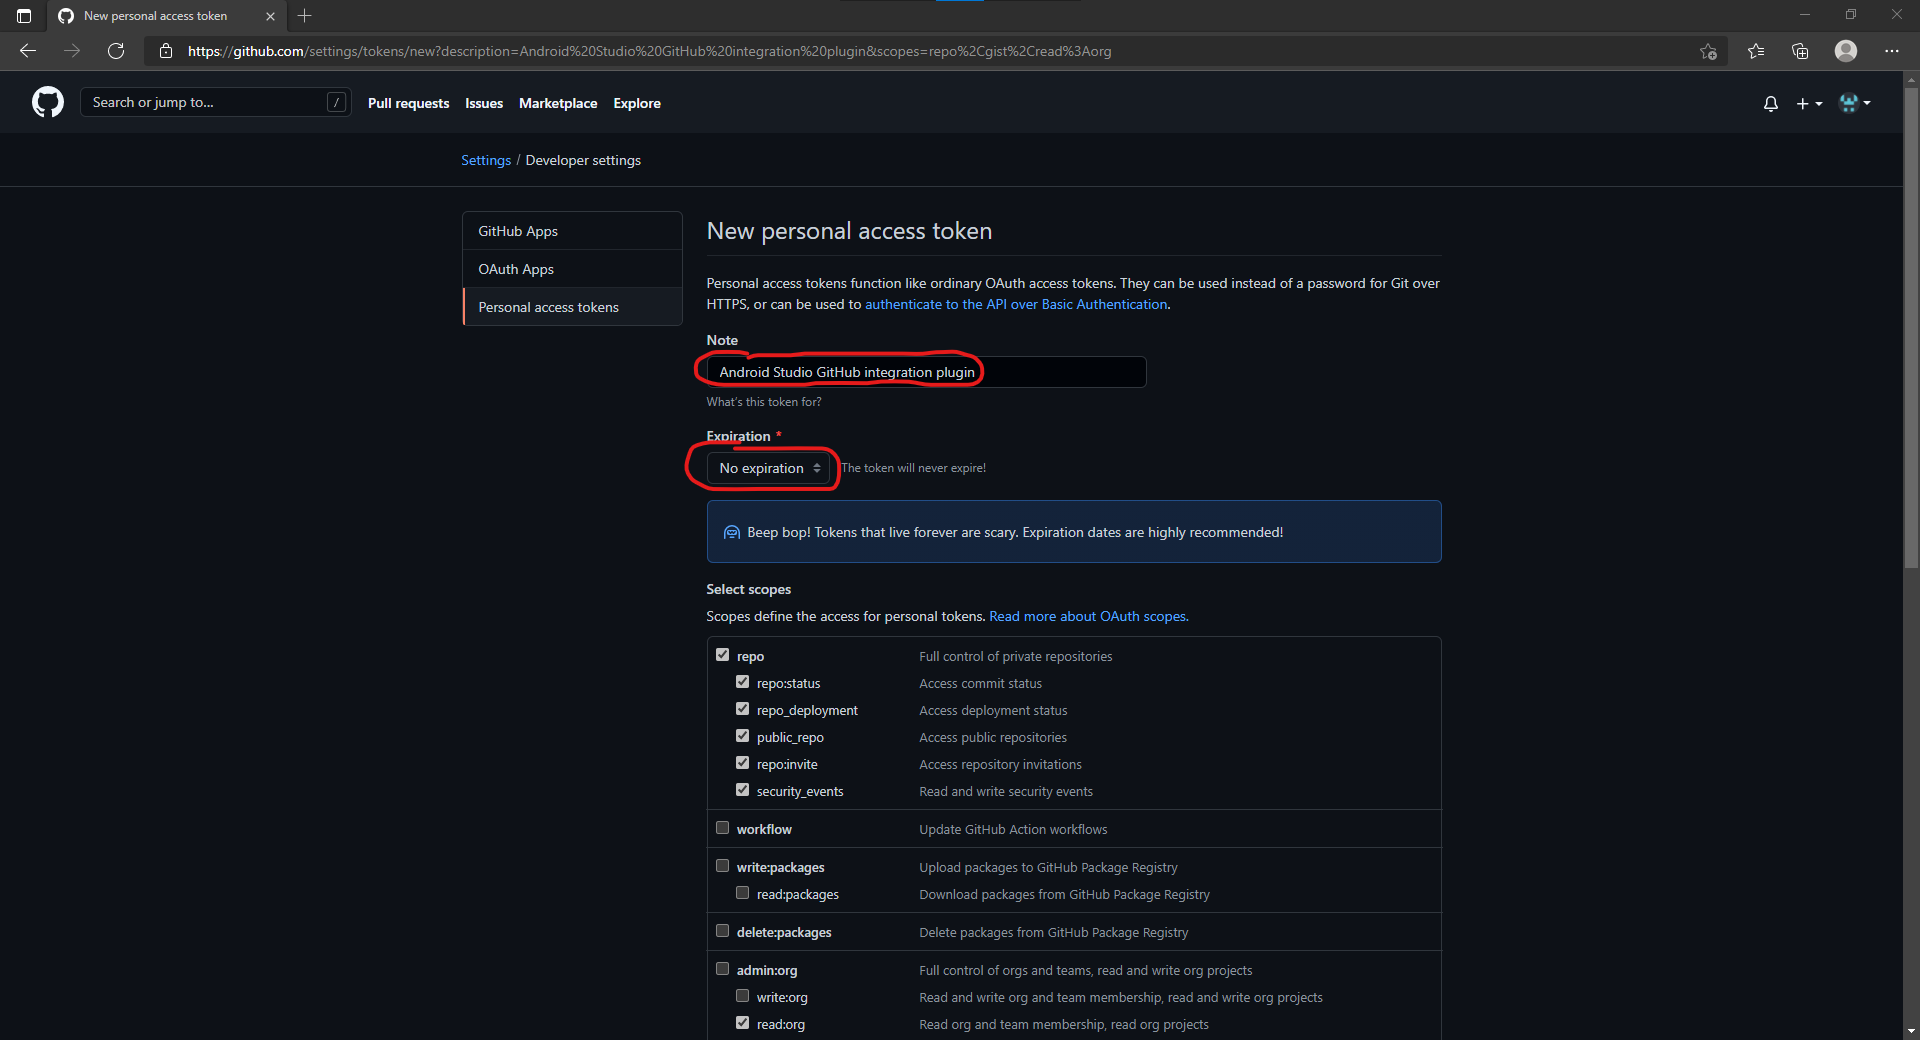
- Scroll to the bottom and select “Generate token”.
- Copy the resulting token (
ghp_XXXXXXXXXXXXXXXXXXXXXXXXXXXXXXXXXXXX).
- In Android Studio, paste this token and click “Log In”.
- Select “Use token…”
- In the list of repositories, select your fork of virtual robot (
virtual-robotor similar).It is recomended that you clone your own personal fork, not the
panthera2021/virtual-robotrepo because you need to do the tutorial by yourselves. - Click “Clone”.